How to Make the Perfect Barbie Cake: A Step-by-Step Guide
Creating a Barbie cake is more than just baking; it’s a journey into creativity, fun, and precision. Whether for a child’s birthday, a themed party, or a special celebration, this cake brings a magical touch to any event. This article will guide you through every step, from planning the design to adding the final dazzling details. Let’s dive into this enchanting world of doll cakes and learn how to make one that will steal the show!
The Allure of Barbie Cakes: Why They’re Always a Hit
Barbie cakes possess an irresistible charm that has captivated the hearts of people across all ages. Moreover, this unique cake style seamlessly combines the elegance of a beloved Barbie doll with a beautifully designed edible gown. Therefore, it often becomes the centerpiece of any celebration, radiating both creativity and elegance.
One reason for their widespread appeal is their versatility, which allows them to fit any theme or occasion effortlessly. Additionally, these cakes can be personalized with an endless array of colors, designs, and decorations, ensuring that each creation is one of a kind. Not to mention, their adaptability means they can reflect individual tastes, ranging from classic princess styles to modern, chic aesthetics. Consequently, Barbie cakes are not just desserts; they are works of art that bring joy and amazement to everyone who sees them.
History and Popularity of Barbie Cakes: A Baking Icon
Barbie cakes have remained a beloved feature at children’s birthday parties for decades, making them an iconic representation of fun, whimsy, and creativity. In fact, these cakes gained immense popularity in the mid-20th century, coinciding with the cultural rise of Barbie dolls. As a result, parents and bakers alike began integrating Barbie into elaborately themed cakes, sparking a trend that continues to thrive today.
Currently, princess cakes and Barbie-inspired designs dominate social media platforms like Pinterest and Instagram, where they showcase their boundless potential for creativity. From intricate fondant detailing to vibrant buttercream skirts, the possibilities for these cakes are virtually limitless. Furthermore, their growing popularity highlights the blend of traditional cake-making techniques with modern artistry, appealing to a wide range of audiences.
These cakes also symbolize imagination, providing a canvas where bakers and home enthusiasts can explore their creative boundaries. What’s more, crafting a Barbie cake is not just about following a recipe; it is about transforming simple ingredients into a memorable masterpiece.iasts alike find joy in crafting these stunning creations, adding a personal touch to every detail.
Occasions for Barbie Cakes: Perfect Themes for Every Event
The versatility of Barbie cakes makes them ideal for numerous occasions. Birthdays, especially for children, top the list of events where this cake shines. They’re also perfect for baby showers, themed parties, or even weddings with a playful twist. In fact, some bakers go the extra mile, designing these cakes for charity events or community gatherings.
No matter the celebration, a Barbie cake always adds a touch of magic and delight, leaving everyone mesmerized by its elegance and creativity.
Planning Your Barbie Cake for Success
Proper planning undoubtedly forms the foundation of crafting a truly stunning Barbie cake. First and foremost, selecting the perfect design is crucial, as it sets the creative direction for your project. Additionally, gathering all the essential tools and materials ahead of time ensures a seamless workflow and reduces stress during the process.
Moreover, this preparatory phase allows you to visualize the final product while also identifying any challenges you might encounter. For example, considering the theme of the event, the recipient’s preferences, and the available resources can help you make well-informed decisions. Furthermore, planning provides an opportunity to sketch ideas, test flavor combinations, and even practice certain techniques to boost your confidence.
By carefully organizing every detail in advance, you not only save time but also enhance the overall experience of creating your Barbie cake. In short, thoughtful preparation sets the tone for a smooth, enjoyable, and rewarding baking journey. So, let’s dive into the key aspects of planning to ensure your cake turns out perfect!
Choosing the Right Design for Your Barbie Cake
When it comes to Barbie cakes, the design options are limitless! Your cake can reflect a theme, such as a classic princess gown, a fairy-tale look, or even a modern outfit. Start by considering the occasion and the preferences of the person the cake is for. For instance, a child might adore a cake inspired by their favorite movie or color palette, while a teen may prefer a chic and contemporary style.
Look online for inspiration or sketch your own design. Pinterest, Instagram, and baking blogs are treasure troves of ideas. Factor in your skill level and available resources—elaborate designs may require advanced techniques and tools. Additionally, plan the decorations: fondant, buttercream, or edible glitter can elevate your cake’s aesthetic appeal. Remember, the key is to balance creativity with practicality to ensure your vision comes to life.
Selecting Flavors and Fillings for Barbie Cakes
Flavors and fillings are just as important as the cake’s appearance. The base flavor should complement the theme of the cake while catering to the recipient’s taste. Popular options for doll cakes include vanilla, chocolate, red velvet, and lemon. For added complexity, consider layered flavors, like pairing chocolate with a raspberry filling.
Choose a filling that’s not only delicious but also structurally sound. Buttercream, ganache, or a fruit preserve works well because they help hold the layers together. Avoid overly runny fillings that might compromise the cake’s stability, especially if it will be carved into a skirt shape. Don’t shy away from experimenting with flavor combinations—just make sure they harmonize and delight the palate!
Gathering Tools and Equipment for Barbie Cakes
Before you start baking, ensure you have all the necessary tools for a seamless Barbie cake-making process. A doll insert or a clean Barbie doll is a must. Next, you’ll need round cake pans in varying sizes to create the skirt’s shape. A serrated knife and cake leveler are essential for trimming and leveling layers.
For decorating, invest in a turntable, piping bags, and icing spatulas. Fondant tools, like smoothers and cutters, are helpful if you’re working with fondant. Lastly, a sturdy cake board and stand are crucial for displaying the finished product. By gathering everything beforehand, you’ll save time and avoid mid-process interruptions.
Baking the Perfect Base for Your Barbie Cake
The base of your Barbie cake forms the foundation for the elaborate decorations to come. Let’s explore how to create a perfectly baked cake that’s stable, moist, and ready for sculpting.
Preparing the Cake Batter for Barbie Cakes
To achieve a sturdy yet moist cake, it’s crucial to prepare the batter with precision. Begin by selecting a recipe that suits your flavor preferences and structural needs—dense cakes, like pound cakes, work best for carving. Measure all ingredients accurately, as baking is a science. Cream the butter and sugar together until light and fluffy, then add eggs one at a time, mixing well.
Incorporate dry ingredients (flour, baking powder, salt) and wet ingredients (milk, vanilla extract) alternately to ensure a smooth batter. Use a stand mixer or whisk, being careful not to overmix, which can make the cake dense. Pour the batter evenly into greased pans of the required sizes and tap them gently to release air bubbles.
Baking Even Layers for Barbie Cakes
Evenly baked layers are key to a flawless Barbie cake. Preheat your oven and ensure the temperature is consistent. If you have different-sized pans, bake them separately to avoid uneven cooking. Place the pans on the middle rack, rotating them halfway through for uniform heat distribution.
To avoid domed tops, use baking strips or reduce the oven temperature slightly. Insert a toothpick into the center of each cake to check doneness—it should come out clean when ready. Once baked, let the cakes cool in the pans for 10 minutes before transferring them to wire racks. This step prevents breakage and ensures even cooling
Cooling and Leveling Your Barbie Cake Layers
Cooling and leveling are crucial steps to achieve a stable base for your doll cake. Allow the cakes to cool completely before handling them. Warm cakes can crumble or lose their shape during carving. Once cooled, use a serrated knife or cake leveler to trim any domed tops, creating flat surfaces for stacking.
For a skirt-shaped Barbie cake, you may need to carve the cakes slightly. Stack the layers and trim gradually, sculpting the desired shape. Remember to save any leftover cake crumbs—they’re perfect for patching gaps or snacking on as you work! With the base ready, you’re all set for the exciting part: assembling and decorating your Barbie cake.
Assembling the Perfect Barbie Cake

Now that your cakes are baked, cooled, and leveled, it’s time to assemble them into a dazzling Barbie cake. This step requires precision and patience to ensure the layers are sturdy and the shape is perfect for decorating. Follow these steps to bring the base of your cake to life.
Stacking Cake Layers for Barbie Cakes
Begin by placing the largest layer on a sturdy cake board or turntable. Spread a generous layer of frosting or filling on top, ensuring an even spread to hold the next layer securely. Repeat the process, stacking each smaller layer on top of the other. Use an offset spatula to smooth the edges, and don’t worry about perfection—this step is about creating a stable base.
Aligning the layers is crucial for a uniform skirt shape. If any layers appear uneven, adjust by trimming or slightly shifting them into position. As you stack, press gently to secure each layer but avoid compressing the cake too much. Use a dowel or skewer inserted through the center to provide extra stability for taller cakes. Once stacked, your cake is ready for carving.
Carving the Skirt Shape for Your Barbie Cake
Carving the cake into a skirt shape transforms it from ordinary to extraordinary. Begin by visualizing the flow of the gown—rounded and elegant. Using a serrated knife, gently shave off small sections from the outer edges of the stacked cake, starting from the top and working downward. It’s better to carve slowly and remove little by little than to take off too much at once.
Focus on creating a smooth and symmetrical curve, mimicking a flowing dress. Don’t forget to rotate the cake as you carve to maintain an even shape. If you make any mistakes, don’t panic—you can patch them up with leftover cake scraps or frosting later. Once the carving is complete, step back and admire your work. You’ve just crafted the base of your doll cake masterpiece.
Inserting the Doll into Your Barbie Cake
To complete the look, carefully insert the Barbie doll into the center of the cake. If you’re using a standard-sized doll, wrap its lower half in plastic wrap to protect it from the cake and frosting. Some bakers prefer using a doll pick designed specifically for this purpose.
Measure the height of the cake and ensure the doll fits snugly. If needed, carve out a small hole in the center of the top layer to accommodate the doll’s base. Gently push the doll into the cake, ensuring it stands upright and is secure. Now your cake is ready for the most exciting step: decorating!
Decorating Your Barbie Cake to Perfection
This is where the magic happens! Decorating your Barbie cake allows you to unleash your creativity and make it truly unique. From applying a crumb coat to adding intricate details, let’s explore how to transform your cake into a showstopper.
Applying a Crumb Coat to Your Barbie Cake
A crumb coat is essential for a polished finish. Spread a thin layer of frosting over the entire cake, sealing in any crumbs. Use a spatula to smooth the surface, ensuring the frosting covers the cake evenly. This layer acts as a base for the final coat, making it easier to achieve a flawless appearance later.
Refrigerate the cake for 15–30 minutes after applying the crumb coat. Chilling it helps set the frosting and keeps the crumbs locked in place, so they don’t mix with your decorative layers. Once the crumb coat is firm, your cake is ready for the next steps.
Creating Fondant and Buttercream Details for Barbie Cakes
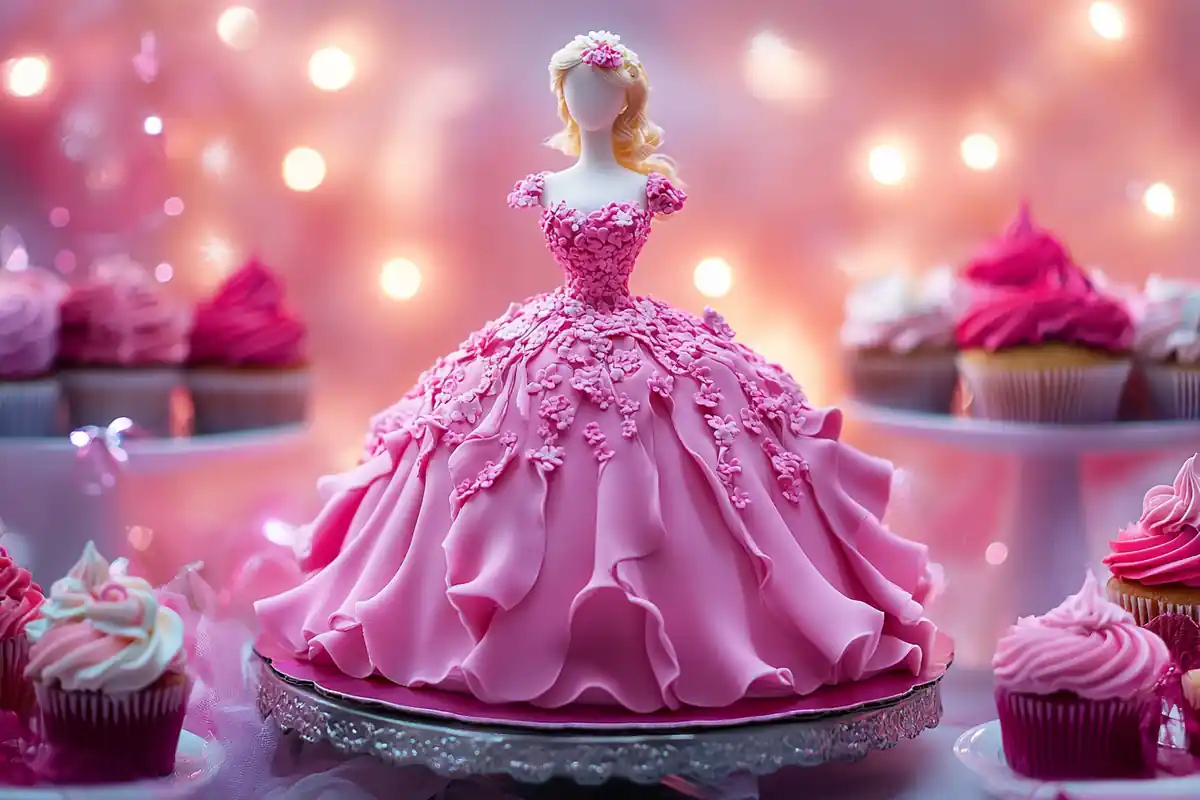
Now comes the fun part—decorating the skirt! If using fondant, roll it out into a large sheet and drape it over the cake. Smooth it gently with your hands or a fondant smoother, trimming away any excess at the bottom. Add pleats, ruffles, or patterns to mimic a real gown. Fondant cutters and molds can help create detailed embellishments like flowers or bows.
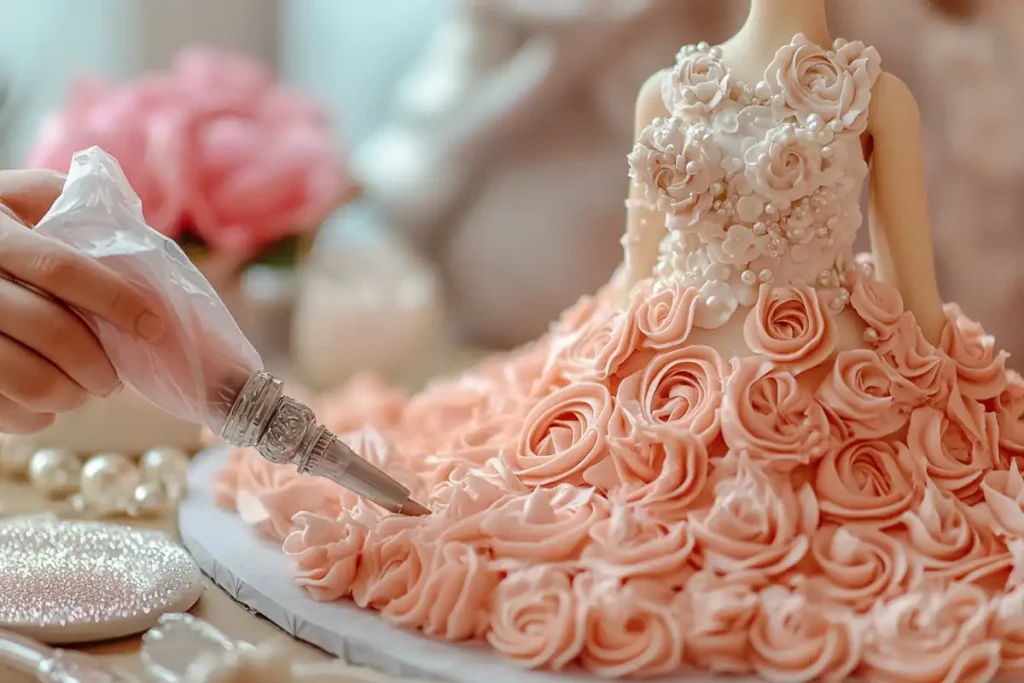
For buttercream, use a piping bag with different nozzles to create swirls, rosettes, or intricate patterns. A star tip is perfect for ruffles, while a round tip can be used for pearls or dots. Experiment with color gradients or edible glitter for an extra touch of glamour.
Final Touches for a Stunning Barbie Cake Design
The finishing touches elevate your Barbie cake from beautiful to breathtaking. Use edible pearls, glitter, or sugar flowers to enhance the gown’s elegance. A tiara or necklace made of fondant can be added to the Barbie doll to complete her look. Use food-safe paint or luster dust to add shimmer and highlights.
Don’t forget the base of the cake! Decorate the cake board with fondant cutouts, piping, or themed accents to tie the entire presentation together. Step back, take a moment to admire your creation, and prepare for the “oohs” and “aahs” when it’s revealed.
Serving and Storing Your Barbie Cake Properly
After the hard work of crafting a beautiful Barbie cake, serving it in style and storing it properly ensures that everyone enjoys it to the fullest. Let’s explore creative ways to present your masterpiece and preserve its freshness for any leftover servings.
Creative Presentation Ideas for Barbie Cakes
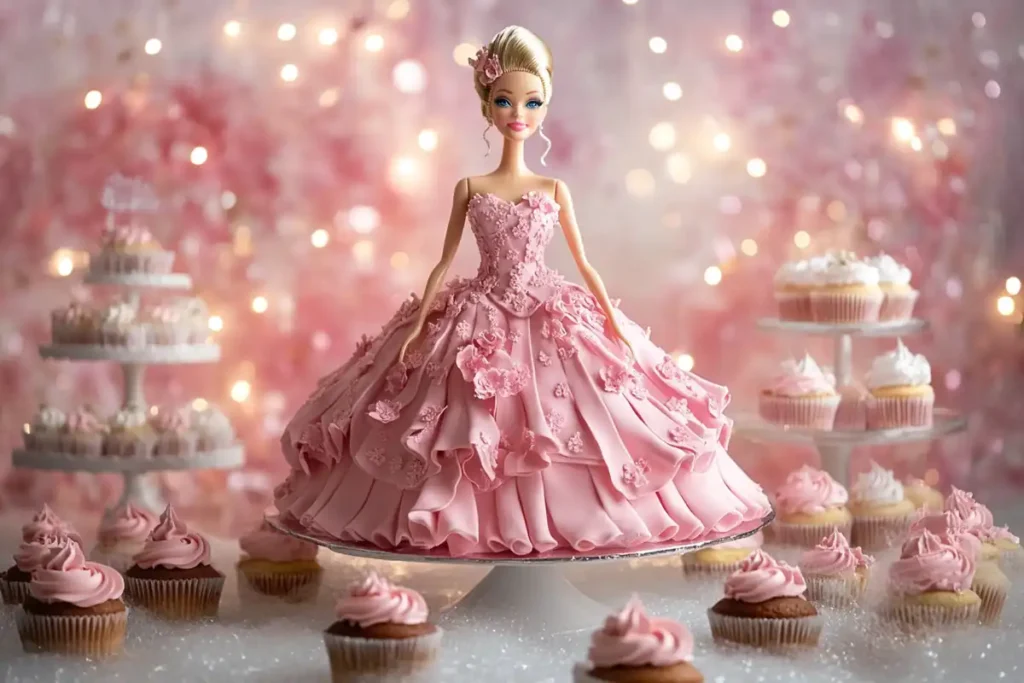
Presentation is key to making your Barbie cake the star of the event. Start by placing the cake on a decorative cake stand that matches the theme—think sparkly bases for princess themes or floral designs for a fairy-tale vibe. Surround the stand with complementary decorations like small figurines, fresh flowers, or matching cupcakes to enhance the display.
Lighting plays a big role too! Use fairy lights or candles to highlight the cake on the dessert table. Adding a personalized cake topper with the recipient’s name or a special message makes it even more memorable. Don’t forget to have a cake knife and serving plates ready to make cutting and sharing seamless and stylish.
Proper Storage Tips for Barbie Cakes
Proper storage ensures your Barbie cake stays fresh and delicious. If you need to store the cake before serving, cover it loosely with plastic wrap or place it in a cake box to prevent it from drying out. Keep it in a cool, dry place—fondant-covered cakes are best stored at room temperature, while buttercream cakes can be refrigerated.
After the celebration, cut the leftover cake into slices and wrap them individually in cling film to retain moisture. Store them in an airtight container in the fridge for up to three days. If you need to keep the cake longer, freeze the wrapped slices, and they’ll stay good for up to two months. Always let the frozen cake thaw in the fridge for several hours before serving.
Frequently Asked Questions About Barbie Cakes
Curious about making, serving, or storing a Barbie cake? Here are answers to some common questions to help you tackle any challenges.
How long does it take to make a Barbie cake?
It depends on the complexity of the design and your experience. On average, it takes 4–6 hours, including baking, cooling, carving, and decorating. For more intricate designs, plan for an entire day to allow for sufficient drying and detailing time.
Can I use any doll for the cake?
You can use a standard Barbie doll or a doll pick specifically designed for cakes. Ensure the doll is clean and wrapped in plastic before inserting it into the cake. If you’re working with a smaller cake, opt for a mini-doll to maintain proportionality.
How do I transport a Barbie cake safely?
Transporting a tall cake like a Barbie cake requires extra care. Place it in a sturdy cake box with a secure lid. Use a non-slip mat underneath to prevent the cake from sliding during transit. Drive carefully, avoiding sudden stops or sharp turns, and keep the cake level at all times.
What alternatives can I use for dietary restrictions?
For gluten-free cakes, use almond flour or a gluten-free flour mix. For dairy-free options, substitute butter and milk with plant-based alternatives like coconut oil and almond milk. Vegan options can be achieved using egg replacers and dairy-free frosting.
How far in advance can I make the cake?
You can bake the cake layers 1–2 days in advance and store them in the fridge wrapped tightly in plastic wrap. Decorate the cake on the day of the event or the evening before to ensure it looks fresh.
Conclusion: Bringing Your Barbie Cake to Life

Creating a Barbie cake is more than just a baking project—it’s a delightful journey into artistry and creativity. Indeed, with proper planning, the right tools, and a touch of imagination, you can craft a cake that’s as memorable as the celebration it graces. From the initial planning phase to the final sparkling touches, each step builds toward a masterpiece that will not only wow your guests but also delight the recipient.
Whether you’re an experienced baker or just starting out, this guide provides everything you need to succeed. Therefore, gather your ingredients, channel your inner artist, and enjoy the rewarding process of bringing a Barbie cake to life. After all, it’s not just a dessert—it’s a showstopping centerpiece, a conversation starter, and, most importantly, a magical moment for someone special. Happy baking! 🎂✨

