
Valentine’s Day is all about love, sweetness, and creativity—and what better way to celebrate than with Valentine’s Day cake pops? These bite-sized treats are not only adorable but also incredibly versatile, making them perfect for gifting, parties, or even a cozy night in. Whether you’re a baking pro or a beginner, this guide has everything you need to create show-stopping cake pops that’ll melt hearts.
From essential tools and ingredients to step-by-step instructions, creative design ideas, and expert tips, we’ve got you covered. Plus, we’ll answer all your burning questions in our FAQs section. So, grab your apron, and let’s get started on making the most delightful Valentine’s Day cake pops!
Introduction to Valentine’s Day Cake Pops
What Are Cake Pops?
If you’ve never heard of cake pops, you’re in for a treat! These delightful little desserts are made by crumbling cake, mixing it with frosting, shaping it into balls or other fun shapes, and then dipping them in chocolate or candy melts. They’re typically served on sticks, making them easy to handle and perfect for sharing.
Cake pops first gained popularity thanks to their whimsical appearance and endless customization options. They’re like mini cakes on a stick—portable, adorable, and oh-so-delicious. And when it comes to Valentine’s Day cake pops, the possibilities are endless. Think heart shapes, romantic colors, and personalized messages that’ll make your loved ones swoon.
Why Valentine’s Day Cake Pops Are a Hit
Let’s face it—Valentine’s Day is all about expressing love, and what better way to do that than with a handmade treat? Valentine’s Day cake pops are a hit because they’re:
- Versatile: Perfect as gifts, party favors, or even a fun activity to do with your significant other or kids.
- Customizable: You can tailor them to match any theme, color scheme, or personal preference.
- Delicious: Combining cake and chocolate? It’s a match made in dessert heaven!
Plus, they’re a great way to show off your creativity. Whether you’re going for elegant and romantic or fun and playful, Valentine’s Day cake pops let you put your own spin on the holiday.
Essential Tools and Ingredients for Valentine’s Day Cake Pops
Must-Have Baking Tools
Before you start making Valentine’s Day cake pops, it’s important to gather the right tools. Trust me, having the proper equipment makes the process so much smoother. Here’s what you’ll need:
- Cake Pop Molds: These help you shape your cake pops into perfect spheres or hearts.
- Cake Pop Sticks: Essential for holding your cake pops together. Opt for food-safe paper or plastic sticks.
- Melting Pot or Microwave-Safe Bowl: For melting chocolate or candy melts evenly.
- Decorating Tools: Piping bags, toothpicks, and small spatulas for adding details.
- Styrofoam Block: This is a lifesaver for holding your cake pops upright while they dry.
If you’re new to baking, don’t worry—these tools are easy to find and won’t break the bank. Plus, they’re reusable, so you can make cake pops for every occasion!
Key Ingredients for Perfect Cake Pops
Now, let’s talk ingredients. The beauty of Valentine’s Day cake pops lies in their simplicity. Here’s what you’ll need:
- Cake Base: You can use any flavor you like—vanilla, chocolate, or even red velvet for a festive touch.
- Frosting: This binds the cake crumbs together. Cream cheese or buttercream frosting works wonders.
- Chocolate or Candy Melts: For coating the cake pops. Choose colors like red, pink, or white to match the Valentine’s theme.
- Sprinkles and Decorations: Heart-shaped sprinkles, edible glitter, or even tiny fondant roses can add a romantic flair.
Pro tip: If you’re short on time, you can use store-bought cake and frosting. No one will know the difference!
Optional Add-Ons for Decoration
Want to take your Valentine’s Day cake pops to the next level? Consider these fun add-ons:
- Edible Markers: Perfect for writing sweet messages like “Be Mine” or “XOXO.”
- Food Coloring: To tint your chocolate or frosting in romantic shades.
- Themed Toppers: Mini flags, edible pearls, or even tiny fondant hearts can make your cake pops extra special.
With these tools and ingredients, you’re all set to create Valentine’s Day cake pops that’ll steal the show.
Step-by-Step Guide to Making Valentine’s Day Cake Pops
Preparing the Cake Base
First things first—bake your cake! Whether you’re using a box mix or a homemade recipe, let the cake cool completely before crumbling it into fine pieces. Then, mix in your frosting. Start with a small amount (about 1/4 cup for a standard cake) and add more as needed. The mixture should hold together when pressed but not be too sticky.
Shaping and Chilling the Cake Balls
Once your cake mixture is ready, it’s time to shape it. For Valentine’s Day cake pops, you can go with traditional round balls or get creative with heart shapes. Use a small cookie scoop or your hands to form even-sized portions.
After shaping, place the cake balls on a baking sheet and chill them in the fridge for at least 30 minutes. This step is crucial—it helps the cake pops hold their shape when you dip them in chocolate.
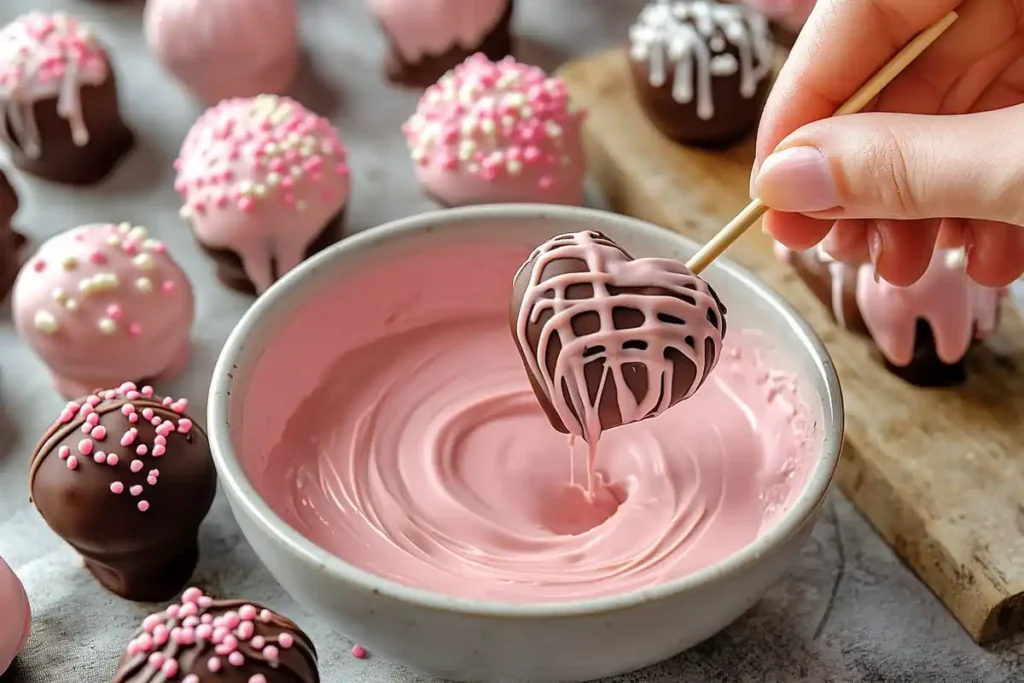
Dipping and Decorating Cake Pops
Now comes the fun part—dipping and decorating! Melt your chocolate or candy melts in a microwave-safe bowl or a double boiler. Dip the tip of each cake pop stick into the melted chocolate, then insert it into a cake ball. This helps secure the stick.
Next, dip the entire cake pop into the melted chocolate, gently tapping off any excess. Before the coating sets, add your decorations—sprinkles, edible glitter, or even a drizzle of contrasting chocolate.
Setting and Displaying Your Cake Pops
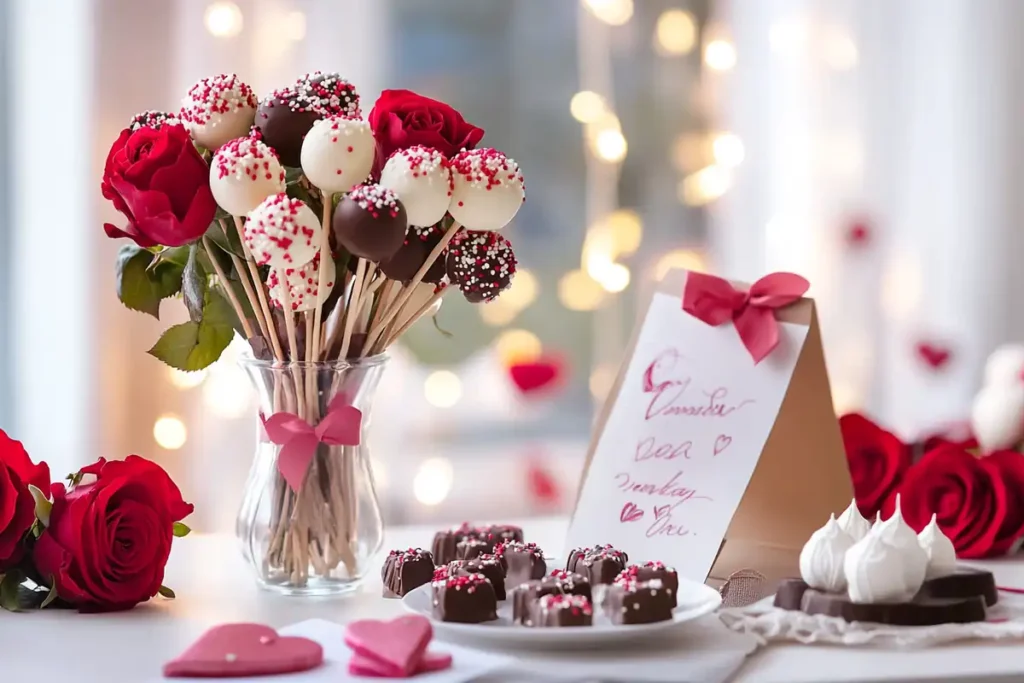
Once decorated, stick your cake pops into a Styrofoam block to dry. This keeps them upright and prevents smudging. After about 15-20 minutes, they’ll be ready to display or package.
For gifting, wrap each cake pop in clear cellophane and tie it with a ribbon. Or, arrange them in a bouquet for a stunning centerpiece. Either way, your Valentine’s Day cake pops are sure to impress!
Creative Valentine’s Day Cake Pop Ideas
Romantic Designs for Couples
When it comes to Valentine’s Day cake pops, romance is the name of the game. Here are some ideas to spark love:
- Heart-Shaped Cake Pops: Use a heart-shaped mold or shape them by hand for a classic Valentine’s look.
- Personalized Messages: Write sweet notes like “Be Mine” or “Forever Yours” using edible markers.
- Red and Pink Color Schemes: Dip your cake pops in red, pink, or white chocolate for a festive touch.
These designs are perfect for surprising your significant other or adding a romantic vibe to your Valentine’s Day celebration.
Fun Ideas for Kids and Friends
If you’re making Valentine’s Day cake pops for kids or friends, it’s all about fun and creativity. Here are some playful and colorful ideas to get you started:
First, go wild with sprinkles. Cover your cake pops in rainbow sprinkles or heart-shaped confetti for a burst of color. Not only do they look festive, but they also add a delightful crunch.
Next, consider making mini cake pops. These bite-sized versions are perfect for little hands and make great party favors. Plus, they’re just as adorable as the regular-sized ones.
Another fun idea is to create edible faces. Use candy eyes, fondant, and edible markers to design cute smiley faces or even animal designs. For instance, you can make little bears, bunnies, or even unicorns.
In the end, these fun ideas are sure to bring smiles to everyone’s faces. Whether you’re hosting a Valentine’s Day party or just having fun with friends, these playful designs will be a hit.
Luxurious Cake Pops for Special Occasions
Want to impress your loved ones with something extra special? Try these luxurious twists on Valentine’s Day cake pops:
To start, add a touch of elegance with gold-dusted cake pops. Simply brush edible gold dust onto the chocolate coating for a glamorous finish. It’s a simple yet stunning way to elevate your treats.
Next, experiment with a marble effect. Swirl different colors of chocolate together for a stunning, artistic look. This technique not only looks impressive but also adds a unique touch to each cake pop.
Additionally, consider using gourmet flavors. Incorporate premium ingredients like dark chocolate, raspberry filling, or salted caramel. These rich and indulgent flavors will make your Valentine’s Day cake pops feel truly special.
Finally, these luxurious cake pops are perfect for making the day feel extra special. Whether you’re celebrating with a romantic dinner or hosting a fancy gathering, these treats will leave a lasting impression.al.
Tips and Tricks for Perfect Valentine’s Day Cake Pops
Avoiding Common Mistakes
Even the best bakers can run into issues when making cake pops. Here’s how to avoid common pitfalls:
- Cracks in the Coating: Make sure your cake balls are chilled and your chocolate isn’t too thick.
- Falling Off Sticks: Dip the stick in chocolate before inserting it into the cake ball for a stronger hold.
- Uneven Coating: Tap off excess chocolate gently and rotate the cake pop for even coverage.
By following these tips, you’ll avoid frustration and create flawless Valentine’s Day cake pops.
Time-Saving Hacks
Short on time? No problem! Here are some quick hacks:
- Use Store-Bought Cake: Save time by using a pre-made cake or cake mix.
- Prep in Advance: Bake and shape your cake balls a day ahead, then decorate on Valentine’s Day.
- Batch Decorating: Dip and decorate multiple cake pops at once to speed up the process.
These hacks are perfect for busy bakers who still want to create something special.
Storing and Transporting Cake Pops
Once your Valentine’s Day cake pops are ready, you’ll want to keep them fresh and intact:
- Storing: Keep them in an airtight container at room temperature for up to 3 days or in the fridge for up to a week.
- Transporting: Use a cake pop stand or Styrofoam block to keep them upright during travel.
Valentine’s Day Cake Pop Recipes
Classic Red Velvet Cake Pops
Red velvet is a timeless flavor, and it’s perfect for Valentine’s Day cake pops. Here’s how to make them:
- Bake the Cake: Use a red velvet cake mix or make it from scratch. Let it cool completely.
- Crumble and Mix: Crumble the cake into fine pieces and mix with cream cheese frosting.
- Shape and Chill: Form into balls or hearts, then chill for 30 minutes.
- Dip and Decorate: Coat with white or red chocolate, then add sprinkles or edible glitter.
These Valentine’s Day cake pops are rich, moist, and oh-so-romantic.
Chocolate Lovers’ Cake Pops
For those who can’t resist chocolate, this recipe is a must-try:
- Bake the Cake: Use a chocolate cake mix or your favorite homemade recipe.
- Mix with Frosting: Combine the crumbled cake with chocolate frosting.
- Shape and Chill: Form into balls and chill until firm.
- Dip and Decorate: Coat with dark or milk chocolate, then drizzle with white chocolate for a fancy finish.
These decadent Valentine’s Day cake pops are sure to satisfy any chocolate craving.
Vegan and Gluten-Free Options
Dietary restrictions? No problem! Making Valentine’s Day cake pops that cater to everyone is easier than you might think. Here’s how to create vegan and gluten-free versions that are just as delicious:
First, choose the right ingredients. Start with a gluten-free cake mix or a homemade gluten-free recipe. Then, pair it with vegan frosting, which is often made with plant-based butter and powdered sugar.
Next, mix and shape your cake pops. Follow the same steps as you would for traditional cake pops, but ensure your cake mixture holds together well. If it feels too dry, add a bit more frosting. On the other hand, if it’s too sticky, chill the mixture for a few minutes before shaping.
After shaping, it’s time to dip and decorate. Use dairy-free chocolate or candy melts for the coating, and opt for vegan sprinkles or edible glitter to add a festive touch. If you’re feeling creative, you can even drizzle contrasting colors of dairy-free chocolate for a professional look.
Finally, these inclusive recipes ensure that everyone can enjoy the sweetness of Valentine’s Day cake pops. Whether you’re hosting a party or giving them as gifts, no one will feel left out with these thoughtful treats. Tine’s Day cake pops.
FAQs About Valentine’s Day Cake Pops
How Far in Advance Can I Make Cake Pops?
You can make Valentine’s Day cake pops up to 3 days in advance. Store them in an airtight container at room temperature or in the fridge. If you need to freeze them, wrap each pop in plastic wrap and store them in a freezer-safe bag for up to a month.
Can I Freeze Cake Pops for Later Use?
Absolutely! Freezing is a great way to save time. Just make sure to wrap them well to prevent freezer burn. Thaw them in the fridge overnight before serving.
What’s the Best Way to Melt Chocolate for Coating?
The key to smooth chocolate coating is gentle heat. Use a double boiler or microwave in short bursts, stirring frequently. Avoid overheating, as it can cause the chocolate to seize.
How Do I Prevent Cake Pops from Falling Off the Sticks?
To keep your Valentine’s Day cake pops secure, dip the tip of each stick in melted chocolate before inserting it into the cake ball. This acts like glue and helps hold everything together.
Are Cake Pops Difficult to Make for Beginners?
Not at all! While they might seem tricky at first, cake pops are quite simple once you get the hang of it. Just follow the steps, take your time, and don’t hesitate to get creative.
Conclusion:

To wrap things up, Valentine’s Day cake pops are more than just a dessert—they’re a heartfelt way to celebrate love and creativity. From start to finish, the process of making these treats is both fun and rewarding. First, you gather your tools and ingredients, then shape and decorate your cake pops to match the occasion. Whether you’re crafting romantic designs for your significant other, playful creations for kids, or luxurious treats for a special occasion, there’s no limit to how creative you can get.
Additionally, with tips and tricks to avoid common mistakes, time-saving hacks, and even vegan and gluten-free options, everyone can enjoy these sweet delights. For instance, if you’re short on time, you can use a store-bought cake mix, or if you’re catering to dietary restrictions, there are plenty of alternatives to explore. So, this Valentine’s Day, why not surprise your loved ones with a batch of homemade cake pops? They’re not just a dessert—they’re a gesture of love, wrapped in chocolate and sprinkles.
Finally, don’t forget to share your creations! Whether you’re gifting them, serving them at a party, or simply enjoying them at home, Valentine’s Day cake pops are sure to make the day extra special. In the end, it’s all about spreading joy and sweetness, one cake pop at a time. Happy baking!